New Project, New Look!
In my foray into freelance writing, I have read many blogs. In so doing, I realized that my renovation blog was a little ... ugly. So, meet the new Tina & Rob's Renos! Not only are we sporting a new look, but a new project. Thank you for reading all these years, even if you just looked at the photos.
So, what crazy project are we starting next? Well, it's a big one. Yes, we've finally decided to approach THE MAIN FLOOR!
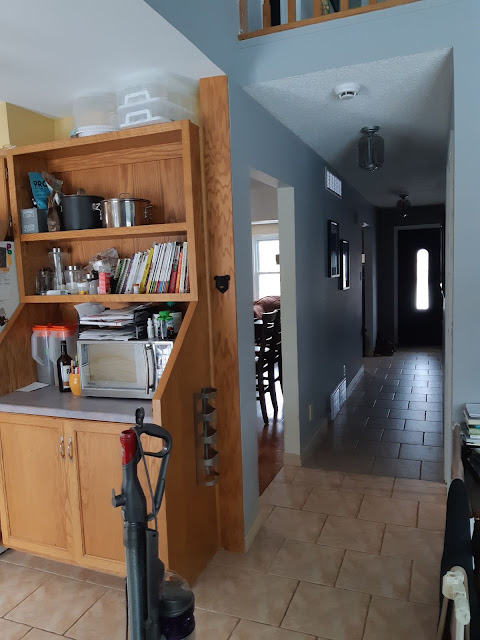
Here it is, in all its "glory":
This project has been in the works for a long time. My good friend Sarah saw a house a few years back that was the same layout without the wall in the kitchen, so we're going to make it look a bit like that!
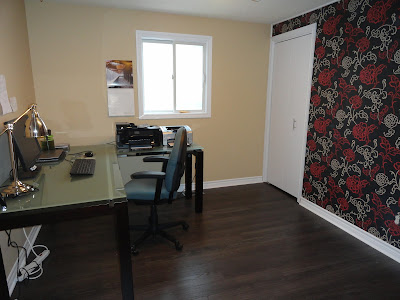
There will be differences in colours and flooring definitely, but the layout will be very similar. We want the stove, peninsula, and open concept layout, but we're going to close off the front room (with sliding barn doors so all the light still comes in) to make a new office for me. And where these people have that bay window, we're going to have a shelving unit, since our window faces our neighbour's garage.
The first real thing we did was get a laser measurer and make a very loose floorplan with accurate numbers (I have made a dozen floorplans of proposed layouts already, including elevations, which you'll see in further posts over the next few months/year).
We then took down the dining room drywall to assess what was under there. Rob used my floorplans and that data to make a better floorplan in Bluebeam.
The wall we want to remove is supporting, which means we need to file a permit, beef it up, and have it inspected. So, we've hired a structural engineer to get that rolling, but he needs to know what the footing is like in our foundation. We are not willing to dig up our basement floor for this, so that means we have to request the house's old plans from the city. UGH
2. Look at the permits but get confused because they don't explain anything
3. Email the city asking them to explain the stuff they left out of their guide (like prices and which specific permit to file if you're only doing one small thing)
4. City emails back and wants clarification that the wall is load-bearing
5. Clarify it is and request your house's old permits/plans (as you've since talked to the engineer who wants these things)
6. City guy tells you which permit to file (yay!), but sends you to a city gal who says you have to file a Freedom of Information and Protection of Privacy Act form before she'll tell you anything about your house (Noooooooooooo)
7. Complain about this to your partner. Seriously, it's the 21st century - I will happily trade my privacy for convenience. Also, they won't let you scan and send it in; you have to do it IN PERSON.
8. Beat your printer like in Office Space after it takes half an hour of threats and pleading to print the 2-page form
9. Because apparently you've fallen into a portal to the pre-digital era, hop on your trolley and take a jaunt down to City Hall to manually hand it in like loser.
10. They process it. Up to 30 days she said! THIRTY DAYS. GIVE ME A BREAK.
11. You get the plans and send them to the engineer
12. They tells you what to do and stamp their drawings
13. You file a permit with city hall
At least, I hope #10-13 are the end of this. It might not be, which will mean more work and I'd also be out $5 for no reason. Currently we're at step 10.
Onward!
I took some 220 grit sandpaper, threw on some podcasts, and sanded away all the top coat. By hand.
After it was all sanded (this took a LONG time, like hours and hours), I taped it up:
Then I stained the top using our favorite colour: Kona! I had to leave the stain on there for almost ten minutes to get it to stick! I did three coats.
Then I primed and painted the bottom and sides.
Next I will varnish them! And move onto the banister at the stop of the stairs. Then the stairway banister itself.
I will need a lot more podcasts ....
Next Steps:
Wait for City Hall
Work with the Engineer
Demo!
Rebuild the beam to proper specifications
So, what crazy project are we starting next? Well, it's a big one. Yes, we've finally decided to approach THE MAIN FLOOR!
Here it is, in all its "glory":
 |
| I decided not to tidy up anything before taking the photo to show it in its natural state |
 |
| Yuck |
 |
| Complete with drying dishes and drying baby play mat haha |
 |
| Pretty much the most boring dining room in history |
 |
| The only part of the room I like, but I can't hang out in it because the dogs have ruined the couch. No, I do not have too many books. You can't have too many books! |
This project has been in the works for a long time. My good friend Sarah saw a house a few years back that was the same layout without the wall in the kitchen, so we're going to make it look a bit like that!
 |
| Yes, we stole the photos from Realtor.Ca |
 |
There will be differences in colours and flooring definitely, but the layout will be very similar. We want the stove, peninsula, and open concept layout, but we're going to close off the front room (with sliding barn doors so all the light still comes in) to make a new office for me. And where these people have that bay window, we're going to have a shelving unit, since our window faces our neighbour's garage.
The first real thing we did was get a laser measurer and make a very loose floorplan with accurate numbers (I have made a dozen floorplans of proposed layouts already, including elevations, which you'll see in further posts over the next few months/year).
 |
| Future Starship Captains have to know their way around tools |
 |
| The current layout. This is very basic and not to scale |
 |
| Future layout. Some little child smudged it |
We then took down the dining room drywall to assess what was under there. Rob used my floorplans and that data to make a better floorplan in Bluebeam.
 |
 |
| I think it looks better than previously haha |
 |
The wall we want to remove is supporting, which means we need to file a permit, beef it up, and have it inspected. So, we've hired a structural engineer to get that rolling, but he needs to know what the footing is like in our foundation. We are not willing to dig up our basement floor for this, so that means we have to request the house's old plans from the city. UGH
Bureaucratic nonsense to file a permit (read at your own risk):
1. Go on the city's website and make an account (apparently this is necessary to just look at the permits)2. Look at the permits but get confused because they don't explain anything
3. Email the city asking them to explain the stuff they left out of their guide (like prices and which specific permit to file if you're only doing one small thing)
4. City emails back and wants clarification that the wall is load-bearing
5. Clarify it is and request your house's old permits/plans (as you've since talked to the engineer who wants these things)
6. City guy tells you which permit to file (yay!), but sends you to a city gal who says you have to file a Freedom of Information and Protection of Privacy Act form before she'll tell you anything about your house (Noooooooooooo)
7. Complain about this to your partner. Seriously, it's the 21st century - I will happily trade my privacy for convenience. Also, they won't let you scan and send it in; you have to do it IN PERSON.
8. Beat your printer like in Office Space after it takes half an hour of threats and pleading to print the 2-page form
9. Because apparently you've fallen into a portal to the pre-digital era, hop on your trolley and take a jaunt down to City Hall to manually hand it in like loser.
10. They process it. Up to 30 days she said! THIRTY DAYS. GIVE ME A BREAK.
11. You get the plans and send them to the engineer
12. They tells you what to do and stamp their drawings
13. You file a permit with city hall
At least, I hope #10-13 are the end of this. It might not be, which will mean more work and I'd also be out $5 for no reason. Currently we're at step 10.
Onward!
Mini Project: The Banisters!
I want to upgrade our banisters along with our entire main floor. Why? Here's why: |
| Plant has since died :( |
After it was all sanded (this took a LONG time, like hours and hours), I taped it up:
Then I stained the top using our favorite colour: Kona! I had to leave the stain on there for almost ten minutes to get it to stick! I did three coats.
 |
| Ugh, sorry for the carrot quality of this photo |
Then I primed and painted the bottom and sides.
Next I will varnish them! And move onto the banister at the stop of the stairs. Then the stairway banister itself.
I will need a lot more podcasts ....
Next Steps:
Wait for City Hall
Work with the Engineer
Demo!
Rebuild the beam to proper specifications


Comments
Post a Comment