Main Floor: So Close to Completion! (Office, Living Room, Trim)
First things first...
The New Office!
Here is the old office (upstairs) and below is the space (downstairs) where the new office was plotted. Part of my dream for the main floor was to move the office downstairs with the pocket doors I'm always rambling about. As well as a better situation for my books. |
| See, hardly enough space. And this was in addition to the full bookshelf upstairs. I used to keep books stacked on the FLOOR like a heathen. |
 |
| This is where my books lived during the reno. In stacks, UNDER MY DESK upstairs. The horror! |
 |
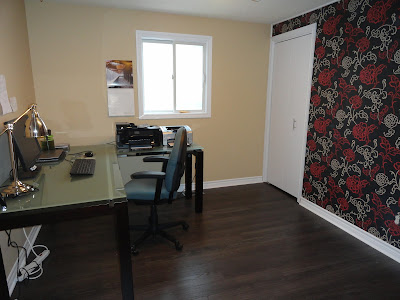
| We moved down my desk and chair and got rid of all tools after I painted. |
I painted the office this lovely Benjamin Moore "Fort Pierce Green". A trend right now is to paint everything Cloud White. Walls, accents, etc. And yes, it looks clean and elegant, but I need colour in my life. And I had a vision for the office as being green, as I wanted it relaxing, and green and books remind me of university libraries (you know, those green lamps?).
I had a couple days off after the holidays and did the trim.
I've always wanted those little spiral pieces at the top of the door frames (truth be told, they also make installing trim easier, as you don't have to match angle cuts together), but Rob didn't want them anywhere (old buzzkill Robert). Given I'm going to be using the office the most, I put them in here. Yeah, it doesn't match the rest of the house, but I don't care. I love them. I may one day sneak them into our bedroom, but we'll see.
 |
| Obviously, this is pre-nail-hole-filler and paint |
Rob also installed the transition strip between the hardwood and the tile and installed the light (which was the light from the office upstairs, as we're going to put a fan in there now)!
Next came the hard part - my books.
Bookshelves - IKEA Billy Hack
I already had two Billy bookshelves but they were, as you can see in this pre-reno photo, overflowing.My DREAM for the office is custom built-ins from floor to ceiling, but we don't have the money or the time right now to indulge in something purely aesthetic, so we opted to spend $110 and buy two more Billies. But, I wanted to spruce them up a little bit.
We debated lining the backs with untreated wood or beadboard, but Rob refused to spend a dime on making my bookshelves look cool (and I had to grudgingly agree), so I just painted them out the same colour as the wall and touched up the faded white of my original billies.
It is far easier to do this on new billies than old, mainly because the bristol board gets warped over time and it is a pain in the ass to put them back in. Lots of swearing. Probably made my cold worse.
 |
| It makes the shelves feel more open. You can't just take off the back entirely, because that flimsy board actually adds a lot of stability to the shelves. |
After copious purging, and amidst insane coughing, my shelves are up and the filing cabinet is down! All I have left is to hang a painting and my plant!
 |
| Some of these are double-stacked LOL |
Trim
I don't have anything overly exciting about this, but we have trim now complete on the main floor! Rob's dad helped finish off some pieces, which we very much appreciated, and I spent some time nail-hole filling, caulking, and touching up the paint. A tip I learned from house painting was to run a bead of caulking at the top of a baseboard and around the casing. It just makes the trim look complete and fills in any gap. And then you run a line of white paint over it and you'd never know it was there. But DON'T use window or bathroom casing - it's too sticky and takes too long to dry. Use quick-dry all-purpose.Living Room
Living Room & Dining Room Swap
Our original plan was to keep the dining room a dining room, but upon trying to reorganize (and figure out where to put the piano, the china, etc), it dawned on us: Why don't we just put the dining room in the room with the fireplace? Not only does it give us more space to chill in the living room (as we don't always eat at the dining room table), but it would be weird to have a piano in the dining room. We also installed a baby gate at the entrance to the kitchen allows us to eat meals without Ruger begging and/or fighting with Denny over dropped (or thrown) food. We could even host functions and have a way to keep Ruger from the food! |
| Old living room. Crammed, dogs were always messing around. |
 |
| UGH BARF |
 |
| Double BARF |
After we decided to swap the rooms, we also bought some IKEA cabinets to store my china and various other used-rarely items.
 |
| Old built-ins |
 |
| New IKEA shelves. The glass doors are a must in our dog-hair filled house |
Living Room Proper
Our thoughts for the living room were to line the bottom (white) section of the room with false panels, for decoration. But once we started putting furniture in the room, we realized there was almost no point at the moment, as most of the walls are blocked from view. We might do it in the future, but for the moment we're going to leave it as is. Besides, we needed to start using the space!Rob for some reason wanted to keep my piano in the office? But after a heated discussion, I prevailed. There's no space for it in the office! And given the photos above, Q.E.D, Robert, Q.E.D!
The upper wall is Benjamin Moore ("Sweatshirt") and the bottom is ("Wedding Veil"). Lovely outfit.
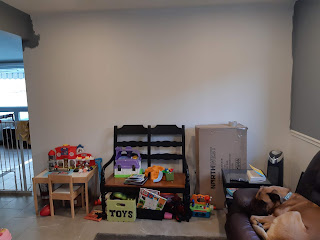
In order to house all of Marcy's toys, we also bought one of those basic storage shelves from IKEA (again). We had initially wanted to put our record player on the new entertainment shelf, but not only did it look cluttered, but the speakers didn't fit. So now the record player is in the basement, which makes more sense anyway.
We used some TD Points to purchase the TV. It's mainly used for Dora, Peppa Pig, and Frozen, but I like to play music on it sometimes. We're going to mount it on the wall eventually.
We've decided we're going to keep the old couch and that random bench for now, until babies are done vomiting on it, then we'll get a nice sectional. We have two pictures to hang too.
But we still need to do the accent wall, which will be here:
 | |||
| And once we have the accent wall and fireplace up, all this junk will be moved somewhere else! |
The Laundry Room Countertop and Sink!
Another project we had on the list was to purchase a new laundry sink and put a countertop over the laundry machines. We have the bad habit, as many people do, of piling crap on the machines and then stuff falls behind and between them and blah blah blah.But first we had to find a laundry tub. We found a pretty cheap sink + cabinet combo at Home Depot. We wanted something basic that wasn't too big. It came with the faucet and all that too, so we said DONE DEAL. Rob spent some time installing it with a little help from Marcy.
 |
| This was what existed for the last few months. Try cleaning paintbrushes in the powder room sink! |
Originally we wanted to do a laminate countertop, but as we were moving things from the new office, we realized that Rob's sweet table he made (see below) would never make it down there without being dismantled. So we had a brilliant idea to use it as the countertop!
 |
| THIS table |
 |
| He might add the table legs to the sides, but it's not a priority as they would be just for aesthetics. |
What's Next?
- The Accent wall!- Rob to build and install the living room light
- Install the pendants in the kitchen *
- Install pot lights in the kitchen *
- Someday, take down that goddamn board still living on the ceiling in the dining room, haha
- Touch up the paint in the new baby's room and prepare the room for her arrival
- THE SHED
- Finish that shelf in the basement that we never finished
- Touch up nail pops in the basement (it's been that long since we renovated it!)
Far Future plans include: California stucco the ceilings upstairs, new carpet, baseboards upstairs, and renovating our bedroom (it really needs it. Yeesh)
* we haven't done these yet because it involves going in the attic for quite awhile, so Rob is waiting for warmer, but not too warm, weather.


Comments
Post a Comment